Art & Early Learning Opportunities for Young Children
Written by Julie Bisnath, BSW, RSW
“Process art” or “open-ended art” is art that focuses on the experience of doing rather than the finished product. It allows children the freedom to explore various materials and mediums without the constraints of “producing”. Process art often does produce beautiful, interesting, and unique results but this is not its purpose. Children may or may not want to keep the end piece. The successfulness of process art is measured in terms of the child’s joy, wonder, and curiosity during the experience of doing—the process of creating.
“Product art”, also known as “crafting”, has developed a bit of a bad reputation in the field of early learning—“craft”—it’s almost become a dirty word. But WAIT! It needn’t be considered as such if your intent is to teach. The difficulty lies in the confusion between the words “art” and “craft”. When working with children, thinking about them as two separate words or activities (i.e. process versus product) helps to see the individual distinctions, benefits, and worth of these two terms (although there is a HUGE gray area and certainly for many people crafting is art and art is crafting).
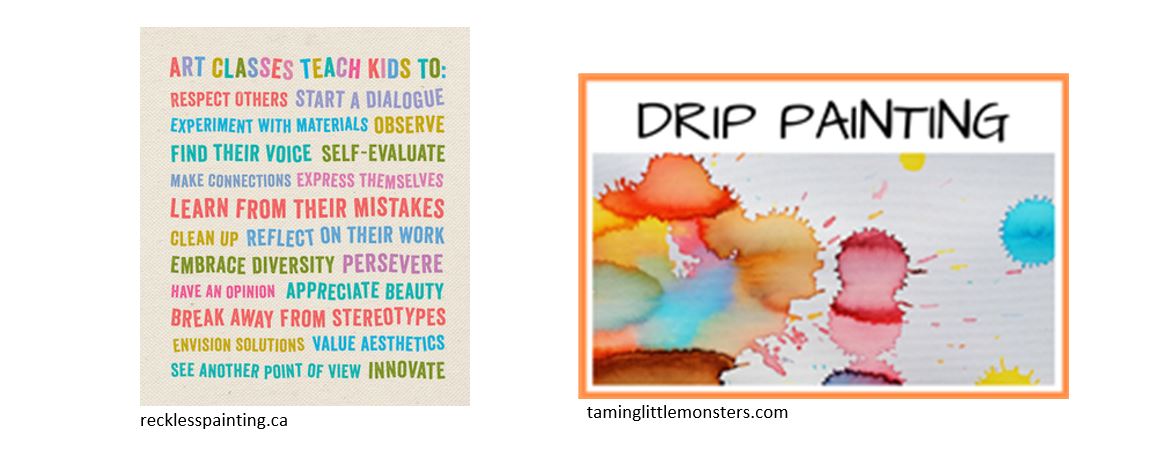
Process art teaches children to value the creative experience and to value experimentation. It allows them opportunities to explore with their senses, and to experience materials and mediums as they relate to one another. It provides inquiry based learning and the opportunity to use, manipulate, explore, and express with a variety of tools and techniques. It teaches children that there is no right or wrong way to create art. Process art is meant to be a calming and relaxing experience. Children make decisions regarding how much, how little, where, when to stop, etc. It teaches children that their art is their own.
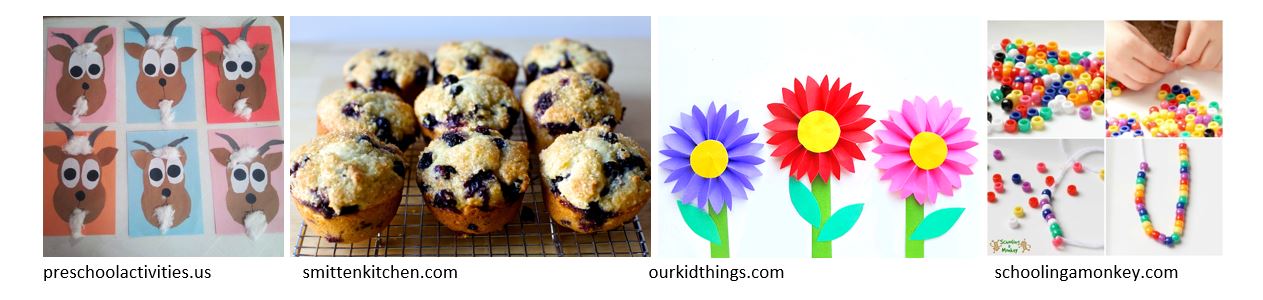
Product art teaches important skills too! Patterning, math, problem solving, planning, sequencing, reading, following instructions, working towards a goal, perseverance, and determination to name a few. When we introduce and expose children to simple crafting (product art) we are setting the foundation for later skills and abilities used in everyday life: completing a recipe, putting together furniture, writing an essay, etc.…we are teaching children that these skills are important and take practice. Learning to hone a particular craft also develops its own skill set and is valuable in and of itself—think of baking, quilting, knitting, woodworking, crocheting, jewelry making, food preserving, etc.—all types of product art and all requiring the skills listed above. Finally, crafting often has strong generational and/or cultural roots. Sharing these types of activities with children fosters a sense of belonging and values family traditions.
A similar comparison would be to think about teaching a sport versus teaching the more general concept of physical activity. Is teaching a sport (with rules, and competitions, and structure) wrong? No, of course not. Is learning a sport the same as learning to be physically active? Not quite. They both have value and they both develop skills and abilities important for health and well-being.
So the big question is: Is providing opportunities for product art appropriate when working with young children? Is it ok to have the children cut and paste and draw, following an example, to produce a particular end result? Absolutely! — If your intent is to teach skills such as sequencing, planning, measuring, etc. The important thing to remember is that product art or crafting is not the same as process art and should not replace the many wonderful opportunities provided by process art for children to create, experience, and express themselves freely—without the expectation to please others or re-create a final product.
What about a compromise? Is there an option that allows for both process and product? Yes, of course! There are many ideas that can be modified to bridge the two together:
- Die cut large shapes and have the children paint them using a variety of tools and colours of their choosing. Older children can also learn by choosing and cutting out their own shapes. One step further would be to have the child draw the shape themselves.
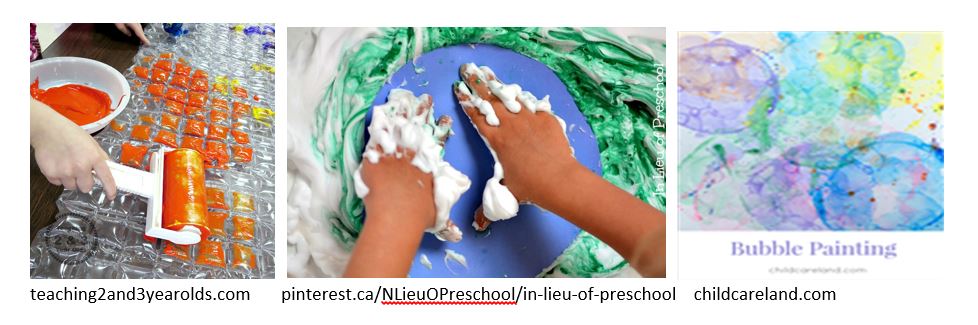
- Provide a sensory art experience (like shaving cream and paint) and the option to make a print if the child wants. The print could be on regular or die cut paper.
- Die cut shapes and provide the children with assorted collage material (various types of paper and/or fabrics, various colours and textures, etc.) for gluing. For example provide large pre-cut pumpkins and many different types of orange fabrics and papers. The children get to choose from the various materials and they decide how much or how little to use.
In the end, there are many benefits to offering both process and product based art activities. Offer these activities often, provide variety, and modify as needed. Follow the cues from your group. Consider the age range of your children, their varied abilities, and their individual interests. Most importantly—is there joy? Are the children curious? Is there wonder and delight? Lead with a happy heart, be open to new experiences, and share in the learning—enjoy the opportunities and your children will too.
Ideas for Encouraging Process Art:
- Messiness is ok and to be expected! This does not mean that the children are permitted to paint your walls or each other! Have them wear play clothes so no one has to worry or feel anxious about getting dirty. Talk to parents ahead of time and explain the concept (and value!) of process art. Have clean up items (towels, wipes, water, etc.) readily available.
- Provide access to open-ended materials—paint, fabrics, water, shaving cream, glue, markers, chalk, paper, pompoms, collage items, clay or play dough, bits and bobbles, etc. You do not have to provide all of the materials at the same time! Too many options can be overwhelming. Large amounts can also be too much—start with a little and add as needed.
- Supervise without providing instruction. Lead by example. Enjoy exploring and creating with the children. Try new things. Get messy!
- If it’s easier—go outside! This is especially true for glitter! Or go outside just for fun and to experience process art in a different environment.
- Introduce materials and tools found in nature: twigs, stones, leaves, grass, etc.
- Use recycled objects: bottle caps, sponges, containers, toothbrushes, bubble wrap, etc.
- Try to allow for long periods of time and/or have the art materials available for children to access and explore throughout the day.
- Comment on the specifics of the process and/or ask questions: “I noticed that you are using the toothbrush to move the paint around on your paper.” “You mixed glue with paint. What happened to the colour? What does it feel like?”
- Let the child decide when they are done and whether or not they want to keep the end result. Do they want to include their name? If so, where?
Ideas for Encouraging Product Art:
- Keep the project age appropriate and set the children up for success (i.e. pre-cut any difficult shapes, pre-measure any difficult ingredients, etc. but let them do as much as they can themselves).
- Provide several models so that the children have a guide but also know that their product does not need to look exactly like one specific model.
- Offer choices: colour/texture of material, added ingredients (raisins or chocolate chips?), glue stick or glue pot and spreader, etc.
- Explain the steps and do the project together (each person can do their own or it can be a combined group effort). Provide visual aids and examples of each step.
- Help the children understand that with some projects following the steps and directions are important. Ask questions. Encourage problem solving. Give them opportunities to learn and practice new skills.
- Do not correct or fix their work—3 eyes and 5 legs are ok! For older children, if the product didn’t quite turn out (to THEIR expectations) that’s ok too, focus on what went well and encourage them to try again. Learning any new skill takes perseverance and lots of practice!
- Focus on positive outcomes: “We did it! We followed all of the steps and now we each have a duck! My duck is yellow, with one eye, and green feathers. Tell me about your duck!”
For more reading check out these links:
https://www.naeyc.org/resources/pubs/tyc/feb2014/process-art-experiences
http://www.ooeygooey.com/handouts/art.pdf